Showing posts with label craft. Show all posts

28 January 2014

Valentine's Craft

My friend has been hosting craft nights every couple
months or so.  Sometimes I do the craft
she's got going on, and other times I have brought my own thing
or simply shown up to have some girls time.

Last week, we made these cutie Valentine's boards.
When I put all of my Valentine decorations out, I didn't really like the combination
on the mantle because I had chosen a pale background and there
was too much red.  So I decided to paint my board pink.

Everyone else followed my friend's example & made theirs red.
And my board was from the scrap pile in the garage, 
(and our second vehicle is taking up the whole garage because the 
engine is spread out all over as Kidney Bean tries to figure out
why it doesn't run well, so no saws available)
so it ended up a little longer than all of the other ones, too.
And I love it.

05 December 2013

Camera Strap

It's a little difficult keeping up with the blogs now
that I've got four kids, but I'm trying to get better again.
Please bear with me.

I was thinking about quitting this blog and putting all my crafts and things up
on my family blog again, but really, I do much better with two even
though I haven't been that great lately.

But life's a work in progress, right?
And a balancing act, especially trying to fit all the stuff I want
to do into a day.  One thing that has 
been helping me is adding some organic apple cider vinegar
to each glass of water that I drink.
At first, it's not that good.  But now I'm to the point
where water doesn't taste quite right if it's not in there.
It's helping with my energy, and a bunch of other things....look it up.

Anyway, the purpose of this post is to show my cutie camera strap that I made yesterday.
I followed the tutorial here,
and then followed her advice and tried adding a strip of jumbo rickrack, which I liked.
And then I added three yo yos with button middles to make it 
a little more cutie.
Her tutorial is really good and I thought it was pretty easy to follow,
so definitely head over there if you want to make yourself a new camera strap.
Go Idaho!

I love it!

I know it's kind of an awkward picture, but the hardware isn't very easy to get on and off,
and since I had attached it before I took the picture, I wanted to
keep it on the camera instead of dealing with that hassle.
And I just used scraps, which is even better.
I have an old SLR camera that stopped working right a few years ago, which is
when I started saving up for the fancy DSLR that I was finally
able to buy last year when it went on sale before Christmas.
I used the hardware from the camera strap from my old camera...I just cut off the 
seatbelt material, then sewed this new one right onto the hardware.

24 July 2013

Betcha Can't Guess...

...what my last name starts with!

Here's my latest home project.
I love it.
And we've still got room on the wall in case
we come across more letters we love or another idea on how to make another one.

I spent less than $30 for all of it.
The white sparkly one, the lower case orange, and the uppercase red
all came home with me in my suitcase from Utah,
when I stopped at the Wood Connection.
The vinyl letters also came from there - in the clearance box for .50 - $1 a piece.
I made the yellow one - it's cardboard wrapped in yarn.
The green and brown ones were found at Michael's for .99 or less.
And the blue one with a threaded letter I made myself from scraps around here.
I'll post a tutorial on that soon.

Here's another look:


12 July 2013

We made some fireworks shirts during FHE a few weeks ago.
Of course, they were to wear on the 4th of July.
I bought the shirts at Joann when they were on sale, 2 for $5.
I let everyone choose if they wanted red, white, or blue.
Except Daddy, since he didn't come with us.  And the baby, since
I just used one of his old onesies.
We cut up some painters tape and placed it where we wanted
the fireworks to be.
Then put some cardboard between the front and back of the shirt so the
paint didn't run through.
 Then we started painting.
We used acrylic paint and round stencil brushes.
Just dab around where you want it.
 We let them dry and then I sealed the paint in
by ironing the shirts...make sure to use a cloth between the shirt and the iron - you don't
want to get paint all over your iron.

 The results:


11 July 2013

Wood Craft

I spent a quick weekend in Salt Lake City last month,
and while I was there I stopped in a the Wood Connection.
It's a little shop that sells unfinished wood crafts.
It's probably a good thing that we don't live nearby and that the things
they sell online are limited, because it's pretty tempting to buy up the whole place.

So many fun things!!
Of course, since I was flying home and had to keep my luggage light, since
I wasn't going to pay to have it checked, I was limited by more than a budget.

I grabbed several things, though.
Some I am still working on, but this one is done and displayed
on the mantle.
The watermelon pieces were around $6, and the vinyl was on
clearance for 50 cents.
I painted the back piece of the watermelon green, then
glued on some red gingham paper, then glued on the beadboard
that I had painted red, and then glued on the seeds.
The yellow sign was a piece of scrap wood from the garage.

They actually sell 2 more pieces of watermelon, which would have made a super
fun collection, but the weight and the budget were considerations that I had to keep in mind.
You can check out their website and see a few things they sell online,
but looking around their blog allows you to see finished products that people
have created from the unfinished products they sell.
So fun!

28 May 2013

Picnic Basket

My little brother is married!

It was so awesome to be able to be with him while he got married.
What a great experience that was last weekend.

And since I was able to finish their present (with time to spare!) and give it to them,
I thought I'd better get on here and post a picture of it.
 I made a large tote that I thought would be a great picnic basket,
with a coordinating picnic blanket.
The tote is from a pattern that I have made once before.
It's large, has 6 outside pockets, and 4 inside.
I don't know his wife very well, but I knew that she likes blue and yellow.
I found some great floral fabric, and lined it with yellow polka dots.
 The picnic blanket is a fabric painter's drop cloth.
I think we used the 5'x8' size.
And to embellish it, I grabbed a stencil brush, taped off a few stripes on two corners,
and dabbed on a bunch of acrylic paint.
After it was dry, I 'set' the paint by running it under a hot iron.
(But used a dry cloth in between the iron and blanket.)
 Here's some close ups of the material.
I wish it was mine!
It turned out so much cuter!  The light blue line on the outside is some
bias tape I used to make the pockets stand out a little more.
 And since we couldn't just give them an empty picnic basket,
the kids and I went down the grocery aisles at Walmart and chose
a bunch of random, picnic-friendly food to fill it with.
 

21 May 2013

New Projects

So I obviously stopped following along with the 
Blog Every Day in May stuff...I didn't really like the topics, 
and I forgot.
Surprise, surprise.
It's a rare occasion when I don't forget something around here.

BUT, I have been remembering to take pictures of a few things we did last week.
There were 2 delicious holidays to celebrate -
sorry you missed them if it was because I neglected to post them.
For
Chocolate Chip Day,
I tried a new recipe, found here.
But I made a few changes.  One, I used mostly-melted butter.
My mixer is having a tough time lately, and since it'll take a few years
to save up for a new one, I can't mix up cold butter.
Even using mostly-melted butter, I sometimes still end up with little clumps
of butter that won't smooth out.
 
Especially frustrating in the frosting process.
But back to the cookies!  I also used regular Hershey's cocoa powder,
since I had it on hand.
And I didn't make them giant.
And I added white chocolate chips.
 
Super delicious!
Here's the dough:
 That's the only picture I took of those babies.
But they were good!
 
Also, last week we celebrated Reese's Day!
So I made some delicious treats using Reese's Pieces.
Peanut Butter Shortbread bars, and chocolate cupcakes with
peanut butter frosting and a few candies on top.
So good.
And since Sunday was
Neighbor Day,
it was a great excuse to give away some goodies.
And I took most of them to ward choir, where they were promptly eaten
as soon as we were done.
 
 
I had never made shortbread before, and it was easy!
I tried to not use my hands to do the final mixing, but it's kind of necessary.
 
My brother is getting married this weekend, so I've got a project going.
I'm making a present, which I can't tell you what it is
just in case one of those lovebirds reads this blog, but here's a sneak peek:
 
And here's another sneak peak at a project that is a joint effort between
my husband and I.
Any guesses what this could be?

 And finally, since I already had the sewing machine out,
I changed the blue strap on this little tote my sister no longer wanted.
It had only one blue strap, but I prefer bags with
2 handles.  So I busted out some ribbon,
guessed on a length, and did a quick switcheroo.
 I like it.
Here's a picture that shows the blue, in case you were wondering.
It worked really nicely to take to church.
It held my scriptures, hymn book (since it was my turn to play
the organ), small notepad, keys, and the lesson that I had prepared to teach.
I have been needing a different bag to use because my last one is now
in the garbage.  I just hope I can keep this bag white enough!
So far, so good.

31 January 2013

Valentine's 2x4 Decor

As prizes for the games at the yellow & gray
baby shower, I made some
Valentine decorations to give away.

And I ended up loving them so much that I was sad to see them go.
But I made sure to take some pictures so
I could remember how they looked when I get out to the garage & cut some wood.

Since my husband was working on the table during the week
leading up to the shower, I had to choose some wood from the scrap box.
But it turned out okay.
Just not okay enough to have more that are the right size.

Bummer, man.

 I think this LOVE sign is a 1x4, about 7 inches long


 This conversation heard was a 2x4, about 3 1/2 inches tall


And the Be Mine sign was a 2x3, about 12 inches wide

I don't have a way to cut vinyl, and my painting skills are very lacking,
at least when it comes to writing clearly and cute-ly.
So what I did for the letters was:
-- open PowerPoint
-- make a box the size of the wood (for instance, a 1x4x7 rectangle)
-- insert a text box into the rectangle and type the word I want on the block (LOVE)
-- choose the font & change the size so it fits in the box
-- move the text box to the side, delete the rectangle, and do the next one
-- when done with all desired text boxes (3 in my case), print it out
-- I cut the words out so there was one word on each piece of paper (I ended up with 4)
-- use painter's tape to secure the paper to the painted/dry block
-- use a ball-point pen to trace the outline of the letters
-- remove the paper and carefully trace the imprint of the letters left by the pen (I used a Sharpie)
-- love and enjoy the result

**It's a good idea to make sure that the paint on your block is dry;
otherwise your Sharpie will stop working**

30 November 2012

Elf on the Shelf

Do you have an elf on the shelf?
Or something you use to daily remind the kids that
Santa is watching extra carefully during the month of December?

We never have, until now.
I just finished making some little elves.
One boy and one girl, so we can change it up a little more.
 The best part is, they are small enough to make from fabric scraps.

We'll see how it goes.

31 October 2012

31 Days of Halloween, 28-31

Happy Halloween!
Isn't it crazy how soon the last few days before a holiday come
and then are suddenly gone?
Is it just me?

Day 28:
I took a break.
31 Days was pretty ambitious, and resting is important.

Day 29:
We made B-b bats in our preschool co-op,
which I'm in charge of for two weeks.
Good thing it's only 2 times a week!

Day 30:
Costumes!  I finished them yesterday
with 4 hours to spare before we went trunk or treating.


Day 31:
Halloween!
We hosted our preschool co-op Halloween party.
Here are some pictures of the treats that I made:
We made some ghosties out of a paper plate
and streamers, played Don't Eat Frank (find the free board and
instructions here), and played 
a small bingo game.

We had rice krispie treat pumpkins,
jell-o jiggler witch hats,
and witch brooms made from pretzels and string cheese (which were eaten 
before I remembered to take a picture).

16 October 2012

31 Days of Halloween: 12 - 15

I know, I know, it's
FINALLY another post.
We had planned for one trip out of town this month, but
ended up having to go out of town again this last weekend.
So it's a catch-up kind of day again.
But it's a great one!

Here's the follow-up to Day 10, my
free Home Depot craft is finished.
 I kinda like it.

Day 12:
Mummify the front door.
After I looked at this picture, I added some
black eye balls, since I thought this was a little strange looking.
 

Day 13:
Paper pumpkins.
I used paper strips and small brads.

Day 14:
Tissue ghosts

Day 15:
ghost on the mirror
I cut out a ghost from some clear contact paper
and stuck it on the bathroom mirror downstairs.
So far, only my husband
has noticed it.
I saw this on pinterest, and the post suggested
that you use some cling wrap, but I don't buy that.
So I thought contact paper would work pretty good, and it did.
PLUS, I was able to draw out the image on the 
backing paper, which I'm not sure if cling wrap has that or not.

I'm still working on today's craft,
so I will have to post it tomorrow.

11 October 2012

31 Days of Halloween: 9-11

Okay, here's the next three!

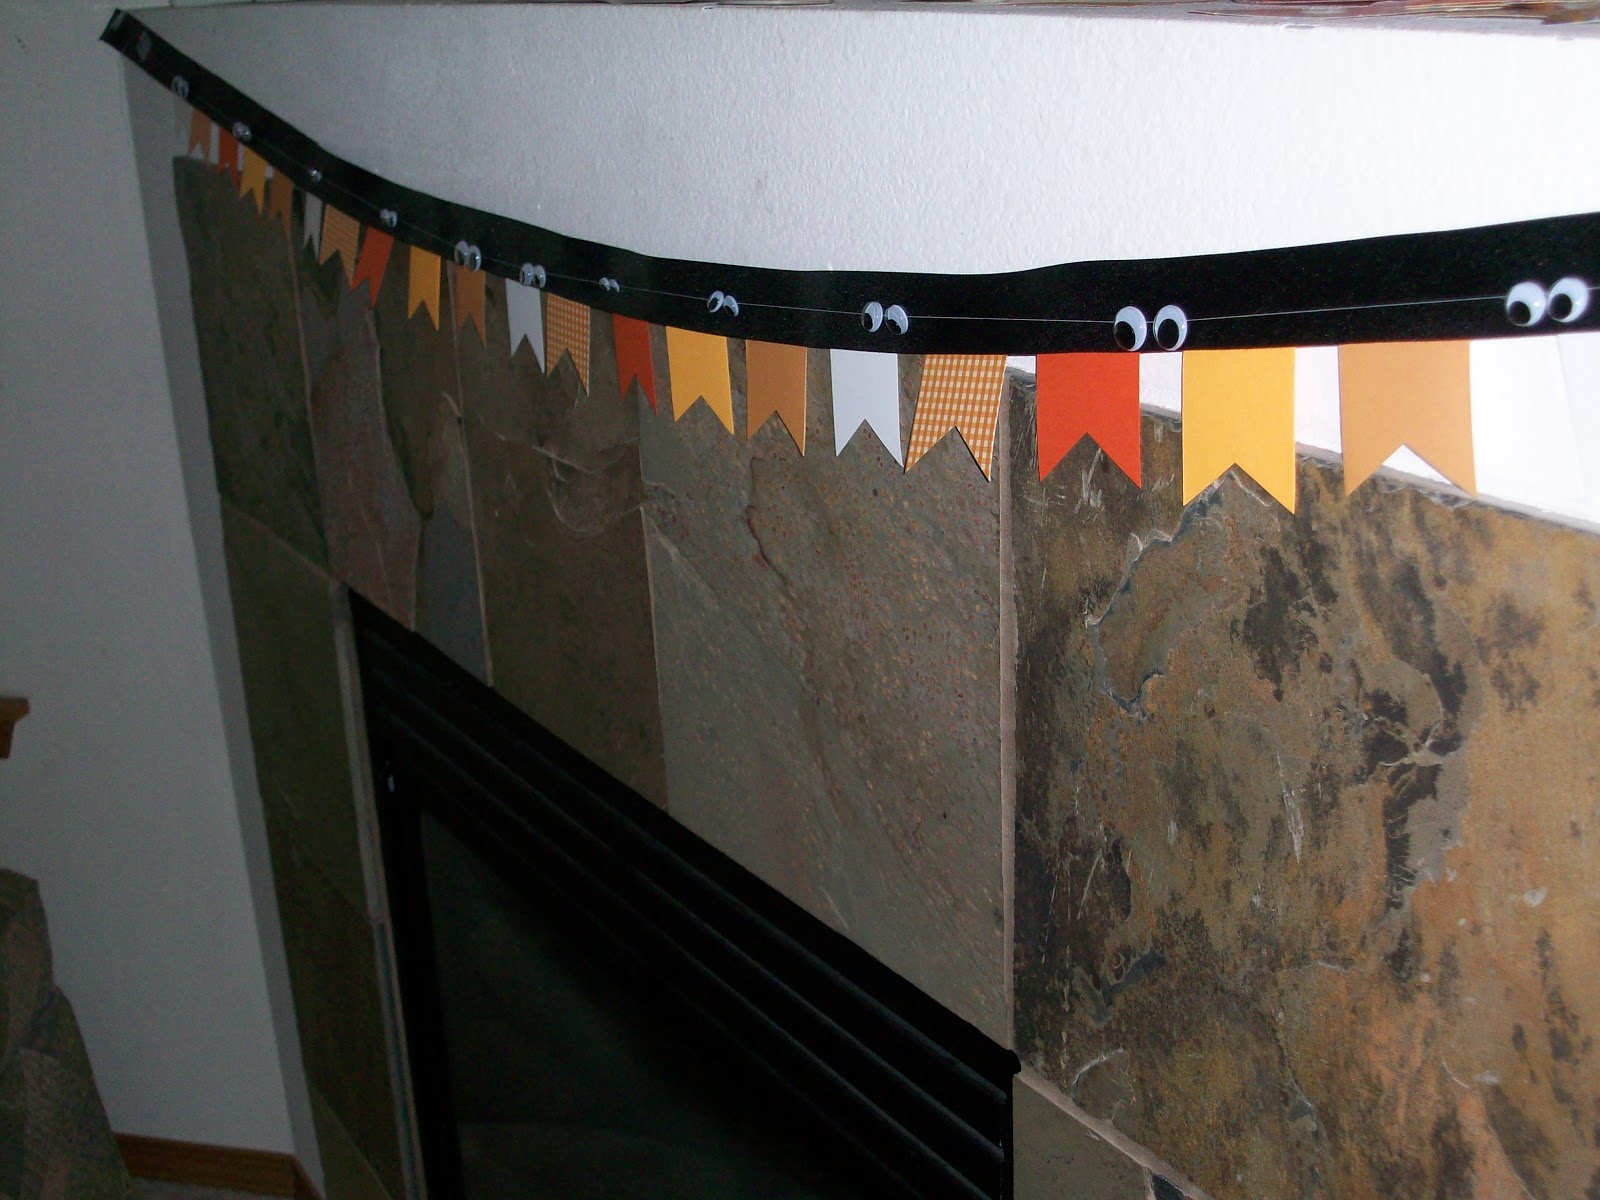
Day 9:
I made a banner for the mantle, which consists of
two pieces - the googly eyes on thread,
and some orange and white papers taped to some black ribbon.
Easy-peasy and cute.


 The whole look.

Day 10:
Last night, a friend and I went to
Home Depot to check out a new thing they are
doing at our store, a
FREE monthly craft night.
The craft last night was based on THIS PICTURE,
and here's how mine looks after last night.
 I'll be finishing it up today.
And post a finished picture later.

The craft night was pretty awesome - the four 2x4s were all
painted the base colors and drilled with holes,
because they are put together with dowels instead of screws.
And they provided more paint, markers, and some templates (I didn't use those).
Anything else that we wanted to have on it, we needed to bring it with us,
like gauze or material (or pink ribbon!) for the mummy.
You should check out if your Home Depot will be doing this, too - it was GREAT!!

Day 11:
That same friend brought me a piece
of her pumpkin cheesecake,
which I will enjoy as soon as I feed the baby.
I'm pretty excited because I could smell
the pumpkin as I was taking the picture - it took some restrain to
eat lunch first.

10 October 2012

31 Days of Halloween, Days 3 - 8


Have you given up on me yet?
Sorry.
We went out of town for the weekend,
and I've been working on getting the house in order.
Even though we cleaned it pretty well before
we left, it's always a chore to get it cleaned up when we get home.

But, I have still been working on my 31 Days of Halloween.
Here's what I've done so far:

Day 3:
  Got out the decorations we already had
and decorated the downstairs.


Day 4:
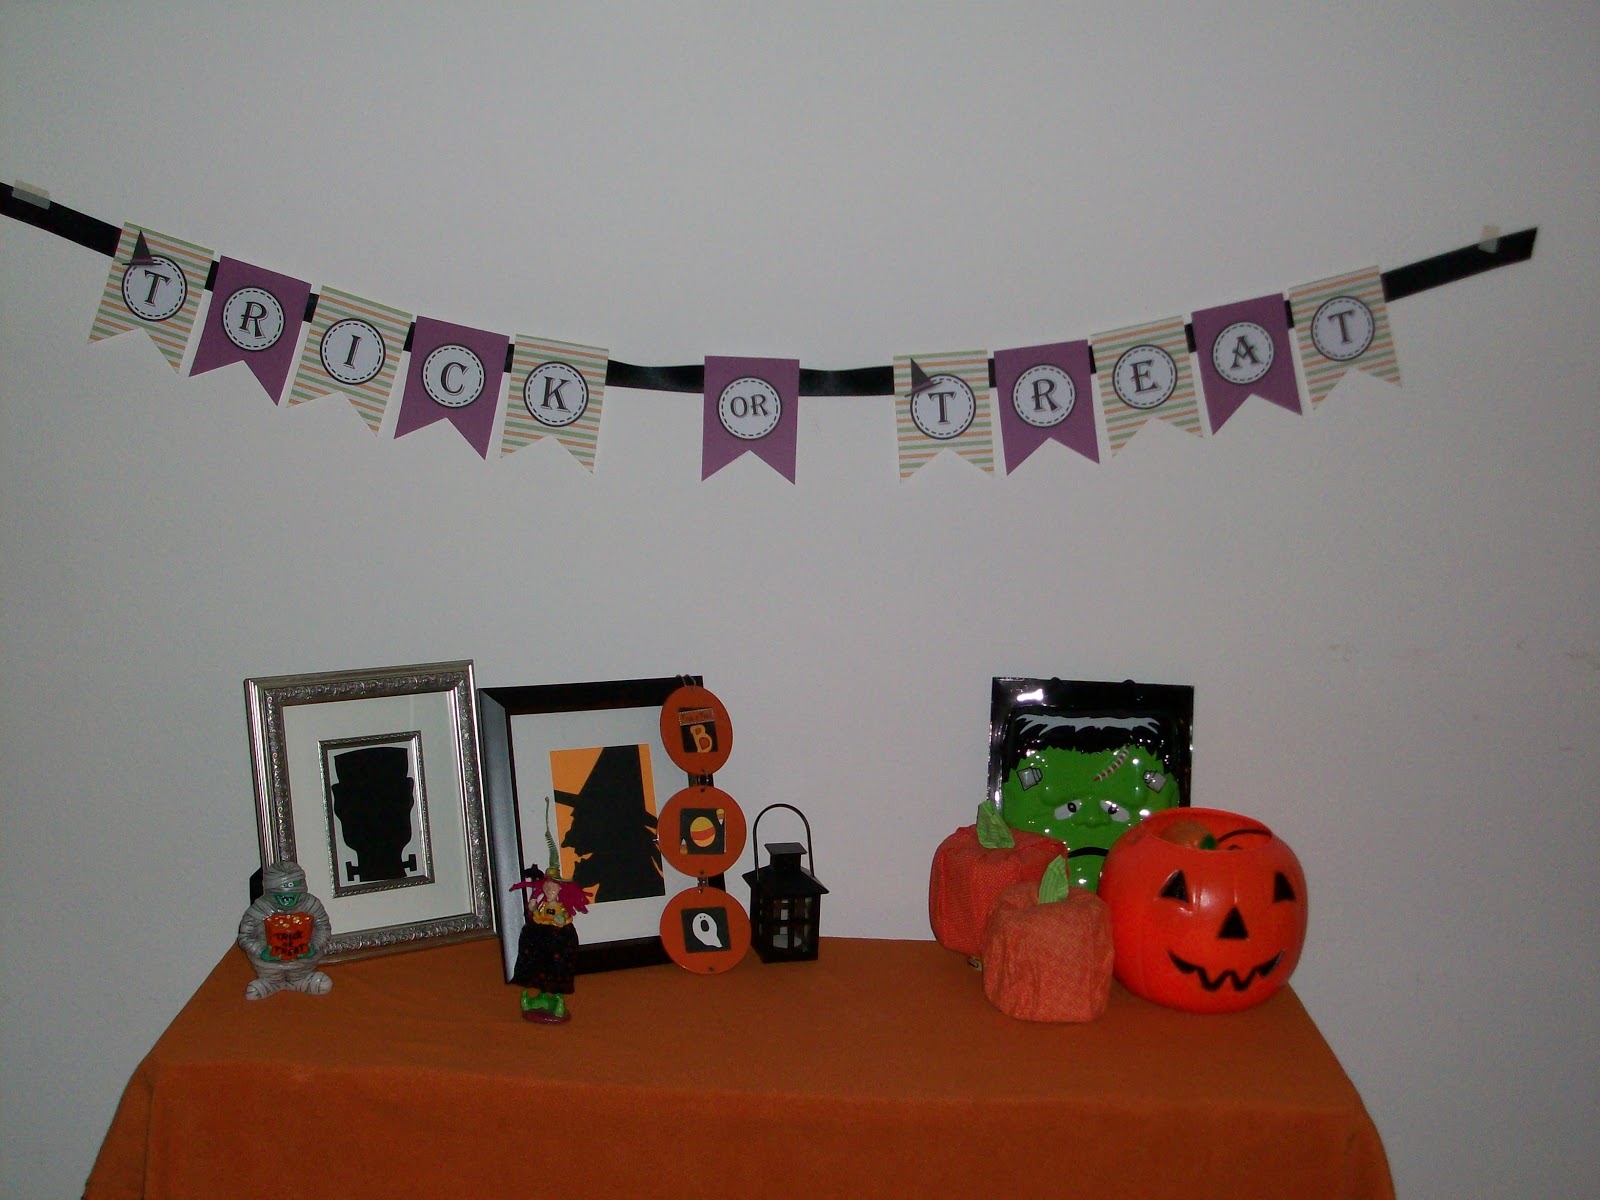
 Printed out some Halloween cuties
and stuck them in frames, then added to the decor
from the day before.
You can find the subway art here, the witch here (available in 8 different colors),
and the say boo here.

Day 5:
 Printed and hung this free Trick or Treat banner.
You can find it here.


 Day 6:
 While we were at grandma's house, the girls
made some spooky haunted houses
with stickers inside the windows and doors.


Day 7:
 Then they made some bats out of circle heads with
pointy ears and tracing their hands for the wings.


Day 8:
 Of course we can't leave grandma's without
my sister painting the girls' nails.  One has candy corn
colors alternating on each finger and the
other has white with green and purple dots.
Or for a different candy corn approach,
see the toes below.  It's a mixture of what
the girls have, candy corn big toe and polka dots for the rest.
Super cute!

Thank you for the free printables to the blogs I linked to.
They have some great ideas, so be sure
to check them out.

02 October 2012

31 Days of Halloween

I don't know about you, but I love Halloween.
It's fun to dress up, fun
to decorate the house, and fun to have trick-or-treaters come.

So to help the kids enjoy the festivities a little more,
and stretch out the celebration, I'm going to try
to do one thing for Halloween each day.

That doesn't mean it will happen, and the kids won't 
necessarily be involved in each activity,
so we will probably end up with a few more than 31 things total.

But it will be great!
Here are the first two things.

I found some free Ben & Jerry's printable skeletons,
which is why they have ice cream in their phalanges.
And I let the girls cut out and glue their own,
so they are looking really unique.

And the other is a graveyard for our annual
tombstones.
For everyone who comes to our house during October,
we have tried to remember to have them decorate a
small paper tombstone.
This is the first year that I have made a graveyard,
and I think it's pretty cute.  Since it's light outside, I had to take
a picture from inside - otherwise it was easier to see me in the reflection than
the graveyard in the window.
I'm pretty excited about it.

Do you have any traditions for Halloween?